
Secure Spring Boot 3.0: A Step-by-Step JWT and Spring Security Guide
20 minutes to read
In this blog post, we'll explore the powerful combination of Spring Security and JWT to perform three essential operations that are critical for secure web application development. Our first step will involve generating a JSON Web Token (JWT) by creating a POST API with the mapping /api/auth/login. Upon entering the correct username and password, this API will generate a JWT with a short validity period to ensure security. To regenerate it, we'll also implement a refresh token. Additionally, we'll dive into generating a refresh JWT and validating a JWT, allowing secure access to a GET API via the mapping /api/details only if the request includes a valid JSON Web Token (JWT).
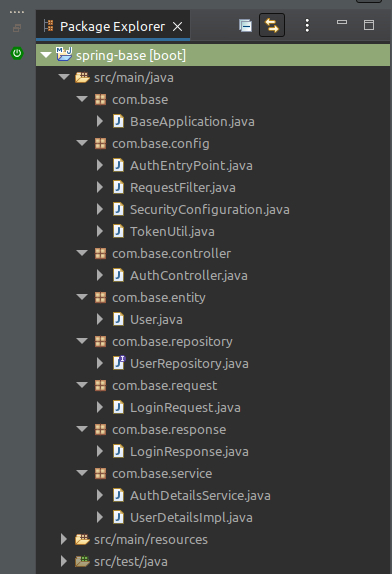
Spring Project will be as follows:
Include the Spring dependencies in the pom.xml file.
Take a look at the following code example:
<?xml version="1.0" encoding="UTF-8"?>
<project xmlns="http://maven.apache.org/POM/4.0.0" xmlns:xsi="http://www.w3.org/2001/XMLSchema-instance"
	xsi:schemaLocation="http://maven.apache.org/POM/4.0.0 https://maven.apache.org/xsd/maven-4.0.0.xsd">
	<modelVersion>4.0.0</modelVersion>
	<parent>
		<groupId>org.springframework.boot</groupId>
		<artifactId>spring-boot-starter-parent</artifactId>
		<version>3.0.2</version>
		<relativePath/> <!-- lookup parent from repository -->
	</parent>
	<groupId>com.base</groupId>
	<artifactId>base</artifactId>
	<version>0.0.1-SNAPSHOT</version>
	<name>base</name>
	<description>Demo project for Spring Boot</description>
	<properties>
		<java.version>17</java.version>
	</properties>
	<dependencies>
		<dependency>
			<groupId>org.springframework.boot</groupId>
			<artifactId>spring-boot-starter-data-mongodb</artifactId>
		</dependency>
		<dependency>
			<groupId>org.springframework.boot</groupId>
			<artifactId>spring-boot-starter-web</artifactId>
		</dependency>
		<dependency>
			<groupId>org.springframework.boot</groupId>
			<artifactId>spring-boot-starter-security</artifactId>
		</dependency>
		<dependency>
			<groupId>io.jsonwebtoken</groupId>
			<artifactId>jjwt</artifactId>
			<version>0.9.1</version>
		</dependency>
		 <dependency>
		    <groupId>javax.xml.bind</groupId>
		    <artifactId>jaxb-api</artifactId>
		    <version>2.3.0</version>
		</dependency>
		<dependency>
			<groupId>org.springframework.boot</groupId>
			<artifactId>spring-boot-starter-test</artifactId>
			<scope>test</scope>
		</dependency>
	</dependencies>

	<build>
		<plugins>
			<plugin>
				<groupId>org.springframework.boot</groupId>
				<artifactId>spring-boot-maven-plugin</artifactId>
			</plugin>
		</plugins>
	</build>

</project>
Just take a look about added dependencies
● spring-boot-starter-data-mongodb
- Because I prefer to use MongoDB for this project, this package will assist me in integrating with MongoDB.
- Configuration details such as username, password, port, and so on will be added to the application.properties that we will investigate further later.
● spring-boot-starter-web
- This is a common dependency when developing a web application.
- Spring web's starter uses Spring MVC, REST, and Tomcat as the default embedded server.
- The single spring-boot-starter-web dependency includes all web development dependencies.
- It also lowers the number of build dependencies.
● spring-boot-starter-security
- However, we must secure our web application, so this dependency will assist us in securing our application; the security configuration will be discussed later.
● jjwt
- Because we use JWT tokens as JSON Web Tokens to ensure user authorization in our application, this dependency will be beneficial.
● jaxb-api
- This one help us to bind our java classes
- The acronym JAXB stands for Java Architecture for XML Binding.
- Java developers can use it to map Java classes to XML representations.
- Java objects can be marshaled into XML using JAXB, and vice versa.
Set the Spring Env variables in the application.properties
Consider the following code:
spring.data.mongodb.authentication-database=admin
spring.data.mongodb.username=root
spring.data.mongodb.password=root
spring.data.mongodb.database=base
spring.data.mongodb.port=27017
spring.data.mongodb.host=localhost
jwt.secret=base_project
jwt.token.validity=120000
As I mentioned earlier, in this file we set the mongoDB username, password, port, etc. and you can see that I have also added secret and validity in here secret is used to encrypt/decrypt the JWT Web Token and validity will be added when we are generating token in here you can see that I have added very short time 120000ms which means 2 minutes this is only for testing purposes of getting refresh token you can set up to 20 minutes in your development
Hopefully, all initial configurations are satisfactory, and we can now proceed to configure the security configuration with our authentication endpoints.
The TokenUtil handles JWT operations like creation and validation.This is accomplished by utilizing the io.jsonwebtoken.Jwts.The earlier mentioned dependency.
As I mentioned earlier in this file, get the values in application. Properties to set the encryption key and validity time, as well as other functions, will aid in the generation and validation of JWT tokens.
package com.base.config;

import java.io.Serializable;
import java.util.Date;
import java.util.HashMap;
import java.util.Map;
import java.util.UUID;
import java.util.function.Function;

import org.springframework.beans.factory.annotation.Value;
import org.springframework.security.core.userdetails.UserDetails;
import org.springframework.stereotype.Component;

import io.jsonwebtoken.Claims;
import io.jsonwebtoken.Jwts;
import io.jsonwebtoken.SignatureAlgorithm;

@Component
public class TokenUtil implements Serializable {

	private static final long serialVersionUID = 1L;

	@Value("${jwt.token.validity}")
	private Integer JWT_TOKEN_VALIDITY;

	@Value("${jwt.secret}")
	private String secret;

	//retrieve username from jwt token
	public String getUsernameFromToken(String token) {
		return getClaimFromToken(token, Claims::getSubject);
	}

	//retrieve expiration date from jwt token
	public Date getExpirationDateFromToken(String token) {
		return getClaimFromToken(token, Claims::getExpiration);
	}

	public <T> T getClaimFromToken(String token, Function<Claims, T> claimsResolver) {
		final Claims claims = getAllClaimsFromToken(token);
		return claimsResolver.apply(claims);
	}

	public String getTokenIdFromToken(String token) {
		final Claims claims = getAllClaimsFromToken(token);
		return claims.get("token").toString();
	}

    //for retrieveing any information from token we will need the secret key
	private Claims getAllClaimsFromToken(String token) {
		return Jwts.parser().setSigningKey(secret).parseClaimsJws(token).getBody();
	}

	//check if the token has expired
	private Boolean isTokenExpired(String token) {
		final Date expiration = getExpirationDateFromToken(token);
		return expiration.before(new Date());
	}

	//generate token for user
	public String generateToken(UserDetails userDetails) {
		Map<String, Object> claims = new HashMap<>();
		return doGenerateToken(claims, userDetails.getUsername());
	}

	//while creating the token -
	//1. Define  claims of the token, like Issuer, Expiration, Subject, and the ID
	//2. Sign the JWT using the HS512 algorithm and secret key.
	//3. According to JWS Compact Serialization(https://tools.ietf.org/html/draft-ietf-jose-json-web-signature-41#section-3.1)
	//   compaction of the JWT to a URL-safe string
	public String doGenerateToken(Map<String, Object> claims, String subject) {
		UUID uuid = UUID.randomUUID();
		claims.put("token", uuid);
		return Jwts.builder().setClaims(claims).setSubject(subject).setIssuedAt(new Date(System.currentTimeMillis()))
				.setExpiration(new Date(System.currentTimeMillis() + JWT_TOKEN_VALIDITY))
				.signWith(SignatureAlgorithm.HS512, secret).compact();
	}

	//validate token
	public Boolean validateToken(String token, UserDetails userDetails) {
		final String username = getUsernameFromToken(token);
		return (username.equals(userDetails.getUsername()) && !isTokenExpired(token));
	}
}
And you'll notice that I've added uuid as a token in the doGenerateToken function, which means we're not going to save the token in our database; instead, we'll store this uuid in the users collection to identify a single login at a time, and every time the user accesses the token, we'll identify the user with this saved uuid; at the same time, a refresh token is generated for the last generated token
Securing web applications is a critical aspect of any software development project. One of the essential components of web application security is user authentication and authorization. In this regard, Spring Security is a popular framework for implementing authentication and authorization in Java-based web applications.
AuthDetailsService is an implementation of the Spring Security UserDetailsService interface. This interface is used to load user details from a database or any other user repository. AuthDetailsService overrides the loadUserByUsername method to fetch user details from the database using the username provided by the user.
When a user tries to authenticate, the Spring Security Authentication Manager calls the loadUserByUsername method of AuthDetailsService to get the user's details from the database. These user details include the user's username, password, and authorities (roles).
package com.base.service;

import org.springframework.beans.factory.annotation.Autowired;
import org.springframework.security.core.userdetails.UserDetails;
import org.springframework.security.core.userdetails.UserDetailsService;
import org.springframework.security.core.userdetails.UsernameNotFoundException;
import org.springframework.stereotype.Service;
import org.springframework.transaction.annotation.Transactional;

import com.base.entity.User;
import com.base.repository.UserRepository;

@Service
public class AuthDetailsService implements UserDetailsService{

	@Autowired
	UserRepository userRepository;

	@Override
	@Transactional
	public UserDetails loadUserByUsername(String username) throws UsernameNotFoundException {

		try {
			User user = userRepository.findByUsername(username)
					.orElseThrow(() -> new UsernameNotFoundException("User Not Found with username: " + username));
			return UserDetailsImpl.build(user);
		} catch (Exception e) {
			System.out.println(e);
			throw e;
		}

	}
}
If you need to modify this response, you can create a new class called UserDetailsImpl.Additional fields can be added to the UserDetails object returned by the loadUserByUsername method.This is the reason for using "UserDetailsImpl.build(user)."
For example, consider the following code snippet:
package com.base.service;

import java.util.ArrayList;
import java.util.Collection;
import java.util.List;
import java.util.Objects;

import org.springframework.security.core.GrantedAuthority;
import org.springframework.security.core.userdetails.UserDetails;

import com.base.entity.User;
import com.fasterxml.jackson.annotation.JsonIgnore;

public class UserDetailsImpl implements UserDetails {
	private static final long serialVersionUID = 1L;

	private String id;

	private String username;

	private String email;

	@JsonIgnore
	private String password;

	private Collection<? extends GrantedAuthority> authorities;

	public UserDetailsImpl(String id, String username, String email, String password,
			Collection<? extends GrantedAuthority> authorities) {
		this.id = id;
		this.username = username;
		this.email = email;
		this.password = password;
		this.authorities = authorities;
	}

	public static UserDetailsImpl build(User user) {
		List<GrantedAuthority> authorities = new ArrayList<>();

		return new UserDetailsImpl(
				user.getId(),
				user.getUsername(),
				user.getEmail(),
				user.getPassword(),
				authorities);
	}

	@Override
	public Collection<? extends GrantedAuthority> getAuthorities() {
		return authorities;
	}

	public String getId() {
		return id;
	}

	public String getEmail() {
		return email;
	}

	@Override
	public String getPassword() {
		return password;
	}

	@Override
	public String getUsername() {
		return username;
	}

	@Override
	public boolean isAccountNonExpired() {
		return true;
	}

	@Override
	public boolean isAccountNonLocked() {
		return true;
	}

	@Override
	public boolean isCredentialsNonExpired() {
		return true;
	}

	@Override
	public boolean isEnabled() {
		return true;
	}

	@Override
	public boolean equals(Object o) {
		if (this == o)
			return true;
		if (o == null || getClass() != o.getClass())
			return false;
		UserDetailsImpl user = (UserDetailsImpl) o;
		return Objects.equals(id, user.id);
	}
}
You can see that the majority of the methods in the above code are overridden simply because they are required for the UserDetails, so I have added them and if you need more fields, you can add them as you wish.
To handle error messages for unauthorized access in web applications, we can extend Spring's AuthEntryPoint class and override its commence method. This class acts as a gateway for unauthenticated requests and rejects them with an error code 401 (Unauthorized). Providing clear and consistent error messages is crucial for preventing security breaches and unauthorized access to sensitive data.
For example, consider the following code snippet:
package com.base.config;

import java.io.IOException;
import java.io.Serializable;

import org.springframework.security.core.AuthenticationException;
import org.springframework.security.web.AuthenticationEntryPoint;
import org.springframework.stereotype.Component;

import jakarta.servlet.http.HttpServletRequest;
import jakarta.servlet.http.HttpServletResponse;

@Component
public class AuthEntryPoint implements AuthenticationEntryPoint, Serializable {

	private static final long serialVersionUID = 1L;

	@Override
	public void commence(HttpServletRequest request, HttpServletResponse response,
			AuthenticationException authException) throws IOException {

		response.sendError(HttpServletResponse.SC_UNAUTHORIZED, "Unauthorized");
	}
}
The AuthEntryPoint is a filter class that is typically used in web applications that implement JSON Web Tokens (JWTs) for authentication and authorization. As you mentioned, this filter intercepts incoming HTTP requests and checks whether the request contains a valid JWT token. If a valid JWT token is found, it extracts the user information from the token and creates an Authentication object that represents the authenticated user.
The Authentication object is then set in the security context, which is a container for security-related information in the application. By setting the Authentication object in the security context, the RequestFilter indicates to other components in the application that the current user is authenticated and can access protected resources.
Overall, the RequestFilter plays a crucial role in implementing secure authentication and authorization in web applications that use JWTs. It ensures that only authenticated users can access protected resources, and it does so by verifying the validity of the JWT token and setting the appropriate security context.
The RequestFilter extends the Spring Web Filter OncePerRequestFilter class. For any incoming request this Filter class gets executed.
package com.base.config;

import java.io.IOException;

import org.springframework.beans.factory.annotation.Autowired;
import org.springframework.security.authentication.UsernamePasswordAuthenticationToken;
import org.springframework.security.core.context.SecurityContextHolder;
import org.springframework.security.core.userdetails.UserDetails;
import org.springframework.security.web.authentication.WebAuthenticationDetailsSource;
import org.springframework.stereotype.Component;
import org.springframework.web.filter.OncePerRequestFilter;

import com.base.service.AuthDetailsService;

import io.jsonwebtoken.ExpiredJwtException;
import jakarta.servlet.FilterChain;
import jakarta.servlet.ServletException;
import jakarta.servlet.http.HttpServletRequest;
import jakarta.servlet.http.HttpServletResponse;

@Component
public class RequestFilter extends OncePerRequestFilter {

	@Autowired
	private AuthDetailsService authDetailsService;

	@Autowired
	private TokenUtil tokenUtil;

	@Override
	protected void doFilterInternal(HttpServletRequest request, HttpServletResponse response, FilterChain chain)
			throws ServletException, IOException {

		final String requestTokenHeader = request.getHeader("Authorization");

		String username = null;
		String jwtToken = null;
		// JWT Token is in the form "Bearer token". Remove Bearer word and get
		// only the Token
		if (requestTokenHeader != null && requestTokenHeader.startsWith("Bearer ")) {
			jwtToken = requestTokenHeader.substring(7);
			try {
				username = tokenUtil.getUsernameFromToken(jwtToken);
			} catch (IllegalArgumentException e) {
				System.out.println("Unable to get JWT Token");
			} catch (ExpiredJwtException e) {
				String requestURL = request.getRequestURL().toString();
				// allow for Refresh Token creation if following conditions are true.
				if (requestURL.contains("/api/refresh-token")) {
					allowForRefreshToken(e, request);
				} else
					request.setAttribute("exception", e);
				System.out.println("JWT Token has expired");
			}
		} else {
			logger.warn("JWT Token does not begin with Bearer String");
		}

		// Once we get the token validate it.
		if (username != null && SecurityContextHolder.getContext().getAuthentication() == null) {

			UserDetails userDetails = this.authDetailsService.loadUserByUsername(username);

			// if token is valid configure Spring Security to manually set
			// authentication
			if (tokenUtil.validateToken(jwtToken, userDetails)) {

				UsernamePasswordAuthenticationToken usernamePasswordAuthenticationToken = new UsernamePasswordAuthenticationToken(
						userDetails, null, userDetails.getAuthorities());
				usernamePasswordAuthenticationToken
						.setDetails(new WebAuthenticationDetailsSource().buildDetails(request));
				// After setting the Authentication in the context, we specify
				// that the current user is authenticated. So it passes the
				// Spring Security Configurations successfully.
				SecurityContextHolder.getContext().setAuthentication(usernamePasswordAuthenticationToken);
			}
		}else if(username != null){
			System.out.println("ELSE");
		}
		chain.doFilter(request, response);
	}

	private void allowForRefreshToken(ExpiredJwtException ex, HttpServletRequest request) {

		// create a UsernamePasswordAuthenticationToken with null values.
		UsernamePasswordAuthenticationToken usernamePasswordAuthenticationToken = new UsernamePasswordAuthenticationToken(
				null, null, null);
		// After setting the Authentication in the context, we specify
		// that the current user is authenticated. So it passes the
		// Spring Security Configurations successfully.
		SecurityContextHolder.getContext().setAuthentication(usernamePasswordAuthenticationToken);
		// Set the claims so that in controller we will be using it to create
		// new JWT
		request.setAttribute("claims", ex.getClaims());

	}

}
As you may have noticed in the above code, we are using several custom classes, including AuthEntryPoint, RequestFilter, and TokenUtil, to implement our JWT-based authentication and authorization mechanism. These classes are annotated with @Component, which allows Spring to automatically detect and manage our custom beans.
However, it's worth noting that we haven't yet configured our security settings. While the custom classes we've implemented provide the core functionality for authentication and authorization, we still need to configure Spring Security to use them. This typically involves defining a security configuration class and specifying the appropriate authentication and authorization settings for our application.
package com.base.config;

import org.springframework.beans.factory.annotation.Autowired;
import org.springframework.context.annotation.Bean;
import org.springframework.context.annotation.Configuration;
import org.springframework.security.authentication.AuthenticationManager;
import org.springframework.security.authentication.dao.DaoAuthenticationProvider;
import org.springframework.security.config.annotation.authentication.configuration.AuthenticationConfiguration;
import org.springframework.security.config.annotation.web.builders.HttpSecurity;
import org.springframework.security.config.annotation.web.configuration.WebSecurityCustomizer;
import org.springframework.security.config.http.SessionCreationPolicy;
import org.springframework.security.core.userdetails.UserDetailsService;
import org.springframework.security.crypto.bcrypt.BCryptPasswordEncoder;
import org.springframework.security.crypto.password.PasswordEncoder;
import org.springframework.security.web.SecurityFilterChain;
import org.springframework.security.web.authentication.UsernamePasswordAuthenticationFilter;

@Configuration
public class SecurityConfiguration {

	@Autowired
	private AuthEntryPoint authEntryPoint;

	@Autowired
	private UserDetailsService userDetailsService;

	@Autowired
	private RequestFilter requestFilter;

    @Bean
    PasswordEncoder passwordEncoder() {
        return new BCryptPasswordEncoder();
    }

    @Bean
    SecurityFilterChain filterChain(HttpSecurity http) throws Exception {
        http.cors().and().csrf().disable()
                .exceptionHandling().authenticationEntryPoint(authEntryPoint).and()
                .sessionManagement().sessionCreationPolicy(SessionCreationPolicy.STATELESS).and()
                .authorizeHttpRequests().requestMatchers("/api/auth/**").permitAll()
                .requestMatchers("/api/test/**").permitAll()
                .anyRequest().authenticated();

        http.addFilterBefore(requestFilter, UsernamePasswordAuthenticationFilter.class);

        http.authenticationProvider(authenticationProvider());

        return http.build();
    }

    @Bean
    WebSecurityCustomizer webSecurityCustomizer() {
        return (web) -> web.ignoring().requestMatchers("/images/**");
    }

    @Bean
    DaoAuthenticationProvider authenticationProvider() {
        DaoAuthenticationProvider authProvider = new DaoAuthenticationProvider();

        authProvider.setUserDetailsService(userDetailsService);
        authProvider.setPasswordEncoder(passwordEncoder());

        return authProvider;
    }

    @Bean
    AuthenticationManager authenticationManager(AuthenticationConfiguration authConfiguration) throws Exception {
        return authConfiguration.getAuthenticationManager();
    }
}
The above code defines a SecurityConfiguration class that configures Spring Security for a web application. The class is annotated with @Configuration, indicating that it provides configuration information for the application.
It defines several beans including PasswordEncoder, SecurityFilterChain, WebSecurityCustomizer, and AuthenticationManager. The SecurityFilterChain bean defines the security rules for the application. It specifies that requests to the "/api/auth/" and "/api/test/" endpoints are permitted without authentication, while all other requests require authentication. The bean also specifies an instance of JwtAuthenticationEntryPoint as the authentication entry point, and an instance of RequestFilter as the filter to use for JWT authentication.
The DaoAuthenticationProvider bean defines the authentication provider to use for the application. It specifies an instance of AuthDetailsService as the user details service, and an instance of BCryptPasswordEncoder as the password encoder. Overall, the code demonstrates how Spring Security can be configured to provide secure authentication and authorization for a web application. By defining custom beans and configuring the security settings appropriately, we can ensure that our application is protected from unauthorized access and potential security breaches.
Now that we have successfully created our security configurations, we must create request and response classes.
The code represents the LoginRequest class, which is used by Spring to handle login requests from the client side. This class contains getters and setters for the various fields that are required for authentication, such as the username and password. When a client submits a login request, Spring will use an instance of this class to extract the necessary information, which can then be used to verify the user's identity and generate a JWT token. By encapsulating the login request data in a separate class like JwtRequest, we can make our code more modular and easier to maintain.
package com.base.request;

import java.io.Serializable;

public class LoginRequest implements Serializable {

	private static final long serialVersionUID = 1L;

	private String username;
	private String password;

	public LoginRequest() {
		super();
		// TODO Auto-generated constructor stub
	}

	public LoginRequest(String username, String password) {
		super();
		this.username = username;
		this.password = password;
	}

	public String getUsername() {
		return username;
	}

	public void setUsername(String username) {
		this.username = username;
	}

	public String getPassword() {
		return password;
	}

	public void setPassword(String password) {
		this.password = password;
	}

}
The following code defines a LoginResponse class that represents the response sent back to the client after a successful authentication request. This class contains a single field, jwt token, which is a String representing the JWT token that was generated for the user. The class also defines a constructor that takes the JWT token as a parameter, as well as a getToken() method that returns the token. By encapsulating the JWT token in a separate class like JwtResponse, we can easily send the token back to the client in a standardized format, making it easier for the client to extract and use the token for subsequent requests.
package com.base.response;

import java.io.Serializable;

public class LoginResponse implements Serializable {

	private static final long serialVersionUID = 1L;
	private final String jwttoken;

	public LoginResponse(String jwttoken) {
		this.jwttoken = jwttoken;
	}

	public String getToken() {
		return this.jwttoken;
	}
}
Now that we have finalized the request and response, it's time to move on to developing our endpoint, just as we originally planned. Fortunately, we already have the necessary components to make this happen - a AuthDetailsService service class and a UserRepository repository. With these in place, we can dive right into the controller section of our project.
So now can create our AuthController Take a look at the following code example:
package com.base.controller;

import java.util.HashMap;
import java.util.Map;
import java.util.Map.Entry;

import org.springframework.beans.factory.annotation.Autowired;
import org.springframework.http.ResponseEntity;
import org.springframework.security.authentication.AuthenticationManager;
import org.springframework.security.authentication.BadCredentialsException;
import org.springframework.security.authentication.DisabledException;
import org.springframework.security.authentication.UsernamePasswordAuthenticationToken;
import org.springframework.security.core.userdetails.UserDetails;
import org.springframework.web.bind.annotation.CrossOrigin;
import org.springframework.web.bind.annotation.GetMapping;
import org.springframework.web.bind.annotation.RequestBody;
import org.springframework.web.bind.annotation.RequestMapping;
import org.springframework.web.bind.annotation.RequestMethod;
import org.springframework.web.bind.annotation.RestController;

import com.base.config.TokenUtil;
import com.base.request.LoginRequest;
import com.base.response.LoginResponse;
import com.base.service.AuthDetailsService;

import io.jsonwebtoken.impl.DefaultClaims;
import jakarta.servlet.http.HttpServletRequest;


@RestController
@CrossOrigin
public class AuthController {

	@Autowired
	private AuthenticationManager authenticationManager;

	@Autowired
	private TokenUtil tokenUtil;

	@Autowired
	private AuthDetailsService userDetailsService;

	@RequestMapping(value = "/api/auth/login", method = RequestMethod.POST)
	public ResponseEntity<?> createAuthenticationToken(@RequestBody LoginRequest authenticationRequest) throws Exception {

		authenticate(authenticationRequest.getUsername(), authenticationRequest.getPassword());


		final UserDetails userDetails = userDetailsService
				.loadUserByUsername(authenticationRequest.getUsername());

		final String token = tokenUtil.generateToken(userDetails);

		String tokenId = tokenUtil.getTokenIdFromToken(token);
		System.out.println("TOEKN ID : " + tokenId);
		return ResponseEntity.ok(new LoginResponse(token));
	}

	private void authenticate(String username, String password) throws Exception {
		try {
			authenticationManager.authenticate(new UsernamePasswordAuthenticationToken(username, password));
		} catch (DisabledException e) {
			System.err.println(e);
			throw new Exception("USER_DISABLED", e);
		} catch (BadCredentialsException e) {
			System.err.println(e);
			throw new Exception("INVALID_CREDENTIALS", e);
		}
	}

	public Map<String, Object> getMapFromIoJsonwebtokenClaims(DefaultClaims claims) {
		Map<String, Object> expectedMap = new HashMap<String, Object>();
		for (Entry<String, Object> entry : claims.entrySet()) {
			expectedMap.put(entry.getKey(), entry.getValue());
		}
		return expectedMap;
	}

	@RequestMapping(value = "/api/refresh-token", method = RequestMethod.GET)
	public ResponseEntity<?> createRefreshToken(HttpServletRequest request) throws Exception {

		DefaultClaims claims = (DefaultClaims) request.getAttribute("claims");

		Map<String, Object> expectedMap = getMapFromIoJsonwebtokenClaims(claims);
		String token = tokenUtil.doGenerateToken(expectedMap, expectedMap.get("sub").toString());
		return ResponseEntity.ok(new LoginResponse(token));
	}

	@GetMapping(value = "/api/details")
	public ResponseEntity<?> getDetails() throws Exception {

		return ResponseEntity.ok("SUCCESS");
	}

}
This example consists of three methods, with the first one being a login endpoint that utilizes a POST API at /api/auth/login through the AuthController. The POST API takes in the username and password as parameters in the request body. To authenticate the username and password, we use the Spring Authentication Manager. Once the credentials are verified, a JWT token is generated using TokenUtil and returned to the client. This endpoint can be accessed without the need for a token. To check the UUID of the current user token, use the following code snippet:
String tokenId = tokenUtil.getTokenIdFromToken(token);
System.out.println("TOEKN ID : " + tokenId);
The second method in our example is used for obtaining a refresh token. This can be done by sending a GET request to the /api/refresh-token endpoint. The request must include the expired token in the header. This allows us to validate whether the token has expired, and if so, calls the allowForRefreshToken() method in our RequestFilter class:
private void allowForRefreshToken(ExpiredJwtException ex, HttpServletRequest request) {

		// create a UsernamePasswordAuthenticationToken with null values.
		UsernamePasswordAuthenticationToken usernamePasswordAuthenticationToken = new UsernamePasswordAuthenticationToken(
				null, null, null);
		// After setting the Authentication in the context, we specify
		// that the current user is authenticated. So it passes the
		// Spring Security Configurations successfully.
		SecurityContextHolder.getContext().setAuthentication(usernamePasswordAuthenticationToken);
		// Set the claims so that in controller we will be using it to create
		// new JWT
		request.setAttribute("claims", ex.getClaims());

	}
This method allows us to access our refresh token endpoint, and we can add further validation as needed. Additionally, the createRefreshToken() method can be used to generate a new access token.
The final method in our example is used for obtaining an endpoint with a token. We've used a GET method at /api/details endpoint. Our filter class is responsible for validating all token validations, and only allows us to access the endpoint once validation is complete.
To explore the code examples discussed in this post, check out our GitHub repository https://github.com/Rajinthan17/spring-boot-security-config We hope this guide has been helpful in configuring Spring Security and JWT for your Spring Boot 3.0 applications.

Software Engineer, Apptimus